Customer Support

+251-943-00-00-07

Email Us

info@Yegnatradingethiopia.com

Types of Construction Nails: What To Use In Different Situations

Nails are arguably the most common materials used within the construction industry. Although simple in both their design and purpose (to act as a fastener for other objects), they come in a vast array of shapes, sizes and materials to suit a variety of requirements.

Here are some of the different types of construction nails available, and which situations to use them in. 

Common Nails

As the name suggests, common nails are familiar to most people as the everyday nail used for routine jobs and projects. Consisting of a slender metal shaft that’s pointed at one end and flat at the other, the common nail is ideal for a variety of different jobs – from basic DIY within the home, to more intricate assignments within the construction industry. Common nails are available in multiple lengths and sizes, starting at one inch and extending to six inches.

Roofing Nails 

Roofing nails are designed to be able to hold roofing materials in place, with heads that are larger in proportion to the shank in order to keep them firmly in position. Roofing nails can also come with a spiral shaft like a corkscrew so that they can be fitted onto a wider variety of materials. Some are also designed with a washer-like disc fastened under the head that is used to increase the surface area it’s fitted to, to keep it strongly secured.

Duplex Nails

Duplex nails, sometimes referred to as double-headed nails, are called so due to the two flat heads they have as opposed to one. While the first head is lower so that it can rest flush against the surface that it’s fastened on to, the second head sits above the surface for greater ease when you need to remove it.

Due to their simpler removal compared with common nails, duplex nails are popular choices for short-term constructions such as scaffolding or temporary structures.

Masonry Nails

Masonry nails are particularly popular within the construction industry because of their impressive strength. They are used to strike into hard and tough surfaces such as concrete buildings. Masonry nails are available in more than one style, with some shafts being fluted and indented and others being quadrangular in particular sections. These different features make them a super versatile nail, capable of being used for a range of different constructions without bending or snapping.

Box Nails

Box nails are available in a range of lengths and sizes, from one inch to three and a half inches. In appearance, they look fairly similar to common nails, though they’re slimmer so that they can be driven into materials such as wood without causing splits or splinters. This makes them ideal for smaller jobs; they’re not recommended for large-scale construction projects that require a substantial amount of structural strength, as they’re simply too thin to provide the power needed.

Finishing Nails

Finishing nails are commonly used in work that requires a professional and flawless finish, as the nails have smaller heads than most others meaning they’re not as noticeable when fixed into the material 

Wooden structures or decorative constructions that have a neat finish would benefit from finishing nails – so that they’re not obvious on a close inspection. Finishing nails come in a variety of different sizes, from one inch to four inches in length.

Collated Nails

 Collated nails are one of the most popular styles of nails used in construction due to their efficiency. They are linked in strips and used in a nail gun. While the specific type of nail can vary, the term mostly refers to the strip in which they’re attached and connected to – often consisting of plastic wire, paper or glue. 

Sinker Nails

Sinker nails are both short and thin in appearance and are most commonly used in areas that are hard to reach.

Sinkers have several rings at the top of the shaft and are then smooth to the point, with the top rings helping to achieve a secure and solid hold once it’s in the material. The nails are usually coated in vinyl or cement; this is so that once friction has heated the nail, the vinyl or cement coating can melt to create a smooth drive. This creates an adhesive bond once cooled.

For more details, please visit https://www.adafastfix.co.uk/Blog/Types-of-Construction-Nails-What-To-Use-In-Different-Situations

What is rebar estimation?

Introduction

In any construction project, the structural integrity and stability of buildings and infrastructure are of utmost importance. Reinforced concrete plays a crucial role in ensuring the strength and durability of structures, and accurate rebar estimation is a vital step in the construction process. This article aims to provide an in-depth understanding of rebar estimation, its significance, and the methods employed to ensure precise calculations.

1. What is Rebar Estimation?


In simple words, rebar estimation is the process of determining how much rebar is needed, what size it should be, and where it should be placed in a concrete structure.. Rebars provide tensile strength to reinforced concrete and prevent cracking and structural failure. Accurate estimation ensures that the right amount of reinforcement is used, avoiding overuse or underuse of rebar.

2. The Importance of Accurate Rebar Estimation

Accurate rebar estimation is crucial for several reasons. Firstly, it ensures the structural integrity and safety of a building or infrastructure. Insufficient rebar can lead to weak structures, while excessive rebar results in unnecessary costs. Secondly, precise estimation helps optimize the use of materials, minimizing wastage and reducing project expenses. Additionally, accurate estimation facilitates smooth construction operations by providing the necessary information to contractors, fabricators, and suppliers.

3. Tools and Software for Rebar Estimation

In the past, rebar estimation was primarily done manually, relying on intricate calculations and drawings. However, with advancements in technology, specialized software and tools have emerged to streamline the estimation process. Rebar estimation software, such as Soule Software, Bluebeam, AutoCAD and Revit, allows engineers and estimators to create detailed 3D models, automate calculations, and generate accurate quantity takeoffs.

4. Manual Rebar Estimation Techniques

While software has greatly simplified rebar estimation, manual techniques still hold relevance. Manual estimation involves studying construction drawings, taking measurements, and calculating rebar quantities using mathematical formulas. Skilled estimators can accurately estimate rebar based on their expertise and experience. Manual techniques are particularly useful for smaller projects or instances where software may not be readily available.

5. Benefits of Using Rebar Estimation Software

Rebar estimation software offers several benefits over manual techniques. It reduces human error, enhances efficiency, and provides a visual representation of the project. With 3D modeling capabilities, estimators can visualize the structure and identify clashes or design issues early on. Moreover, software allows for quick revisions and updates, saving time and effort. The use of software also promotes collaboration among various stakeholders, enabling seamless communication and coordination.

6. Factors Affecting Rebar Estimation

Several factors influence rebar estimation, including the type of structure, design requirements, and local building codes. The complexity of the design, the presence of load-bearing elements, and the anticipated environmental conditions also impact the estimation process. It is crucial to consider these factors to ensure accurate estimation and compliance with safety standards.

7. Challenges in Rebar Estimation

Rebar estimation poses certain challenges that estimators must overcome. One such challenge is the interpretation of complex construction drawings and specifications. Estimators must possess a deep understanding of structural engineering principles and be proficient in reading and comprehending technical drawings. Additionally, estimating rebar in irregular or curved structures can be more challenging than in straight-line structures.

8. Best Practices for Rebar Estimation

To achieve accurate rebar estimation, following best practices is essential. It is crucial to thoroughly review construction drawings and specifications, paying attention to critical details. Estimators should communicate with design teams and contractors to clarify any ambiguities or resolve discrepancies. Adopting standardized estimation techniques and maintaining a database of historical project data can also improve accuracy and efficiency.

9. Rebar Estimation Process Step-by-Step

The rebar estimation process typically involves the following steps:

  1. Reviewing project specifications and drawings
  2. Determining the design requirements and applicable building codes
  3. Identifying the areas where rebar is required
  4. Taking accurate measurements and noting the dimensions
  5. Calculating the quantity of rebar based on design standards and spacing requirements
  6. Creating a detailed estimate with itemized quantities and sizes
  7. Cross-checking the estimate for accuracy and completeness
  8. Presenting the estimate to the project team for review and approval

10. Quality Assurance in Rebar Estimation

Quality assurance is crucial to ensure the reliability and accuracy of rebar estimation. It involves conducting regular checks and audits to validate the estimation process. Quality assurance measures may include independent reviews, sample checks, and comparison with actual project data. By implementing quality control procedures, estimators can minimize errors and improve the overall quality of estimates.

11. Rebar Estimation and Project Costing

Accurate rebar estimating plays a significant role in project costing. It allows contractors to determine the material and labor costs associated with reinforcement. Precise estimation helps in generating accurate project bids, avoiding cost overruns, and maintaining profitability. By aligning rebar estimation with project costing, construction companies can effectively manage their budgets and resources.

12. Future Trends in Rebar Estimating

As technology continues to advance, “rebar estimating” is expected to witness further improvements. Building Information Modeling (BIM) integration with rebar estimation software is becoming more prevalent, enabling seamless data exchange between different project stakeholders. Automation and artificial intelligence are also being explored to enhance accuracy and speed in estimation processes.

13. Common Mistakes to Avoid in Rebar Estimate

Rebar Estimating can be complex, and several common mistakes should be avoided to ensure accurate results. Some common errors include overlooking design changes, incorrect unit conversions, neglecting overlap requirements, and not considering the potential for wastage. Additionally, relying solely on software without manual verification can lead to errors if drawings or specifications are incomplete or inaccurate.

14. Case Studies: Successful Rebar Estimation Projects

Several construction projects have achieved success through accurate rebar estimation. Examples include large-scale infrastructure projects like bridges, high-rise buildings, and stadiums. In each case, precise rebar estimation played a vital role in ensuring structural integrity, cost optimization, and timely project completion.

15. Conclusion

Rebar estimation is an indispensable part of construction projects, ensuring the strength, durability, and safety of structures. Accurate estimation is achieved through a combination of manual expertise and advanced software tools. By following best practices, considering key factors, and embracing future trends, estimators can deliver reliable and precise rebar estimates. Implementing quality assurance measures and avoiding common mistakes further enhance the estimation process, leading to successful construction outcomes.

How to Check the Quality of Cement

Whether you are building a home, a bridge, or a high-rise building, the quality of cement matters. But not all cement’s quality remains the same, some can give you the desired results and some can make your job harder. That is why it becomes crucial to use high-quality cement. Quality testing helps us know if the cement is strong enough, will last long, and do its job well. Read on to learn more about cement quality testing to ensure the buildings and roads you make are safe and strong.

How To Check Cement Quality On-site?

These on-site tests for cement are quick indicators to evaluate its quality, especially for minor construction tasks. 

Date of packaging (MFG Date):

Note the manufacturing date (MFG Date) on the packaging. The strength of cement might diminish over time. According to IS Specifications, if the cement is stored for more than three months, it should undergo retesting to ensure its quality and strength meet the required standards.

Visual inspection:

Check for a greenish-grey shade, which varies based on the cement type. Ensure there are no visible lumps or irregularities.

Sensory tests:

Put your hand into the cement bag and check whether it is cold or not. If it feels cold, it indicates freshness. Furthermore, take a pinch of cement and rub it between your fingers, it should feel smooth without any grittiness.

Float test:

Grab some cement and toss it onto a bucket of water. Watch closely as the cement particles float for a brief moment before gradually sinking. This indicates that the cement is of the right density and purity.

Consistency check:

Mix around 100 grams of cement with water to form a stiff paste. Shape the paste into a cake with sharp edges. Submerge it slowly underwater without disturbing its shape. After 24 hours, the cake should retain its original shape and gain some strength. If this does not happen, consider replacing the lot.

How To Check Cement Quality with Laboratory Testing?

When ensuring the suitability of cement for critical construction, confirming its adherence to Indian Standard Specifications becomes imperative. Factors like transportation, storage, and handling pre-use can impact its quality:

Fineness test:

The fineness of cement significantly influences its rate of hydration, the speed of gaining strength, and the heat evolution during the process. Finer particles offer a larger surface area, accelerating the development of strength. However, excessively fine grinding might lead to air setting and premature deterioration. The purpose of the fineness test is to assess the surface area of cement particles, determining their impact on strength development.

Setting time tests:

These tests assess the time taken by cement to set.

Initial setting time:

This time frame starts when water mixes with cement until the paste begins to lose its plasticity. The initial setting time is vital for handling, transportation, and placement of cement-based mixtures. Ensuring an adequate initial setting time allows for proper mixing and placement before solidification.

Final setting time:

The final setting time is the time between the instance water mixes with cement and the instance when the paste completely loses plasticity and attains sufficient firmness to resist specific pressure. It influences the completion of concrete placement and its readiness to withstand external forces.

Soundness test:

This test aims to detect any excessive expansion in cement after setting. Certain types of cement can undergo significant expansion after setting, leading to disruptions in the hardened mass and potentially compromising the structural integrity of the structure. Unsoundness can result from excess lime combined with acidic oxides in the kiln. It can also be caused by inadequate burning, insufficient fineness of grinding, or improper mixing of raw materials during the cement production process.

Heat of hydration test:

It aims to measure the quantity of heat released during the cement hydration process. This exothermic reaction can generate a substantial amount of heat. Understanding this heat generation is critical for managing temperature-related issues, especially in massive concrete structures like dams.

Chemical composition test:

This test aims to identify and quantify the various chemical constituents present in cement. This includes compounds like silica, alumina, iron oxide, calcium oxide, magnesium oxide, and others, which directly impact the properties and behaviour of cement during hydration and setting.

For more details, https://www.jkcement.com/blog/basics-of-cement/how-to-check-the-quality-of-cement/

What is Cement Hydration?

Cement acts as a binding agent when used in concrete or mortar mix. Being anhydrous in nature, cement requires to be hydrated to let it gain its binding strength. This is when the cement hydration process begins. When cement and water are mixed, they trigger a series of exothermic chemical reactions leading to the formation of crystalline structures and binding agents. Cement hydration happens in several phases and forms different products. If you want to learn more about the cement hydration process, read on.

What Is Cement Hydration?

Cement hydration is a series of chemical reactions that occur when water combines with cement particles. The major component in cement, particularly Portland cement, reacts with water to form various hydration products. The primary products formed during this reaction are calcium silicate hydrate (C-S-H) gel, calcium hydroxide (CH), and ettringite. These compounds contribute significantly to the strength and durability of the concrete. The hydration process is time-sensitive, and its progression is influenced by factors such as temperature, water-to-cement ratio, and the presence of supplementary cementitious materials.

Products Formed During the Cement Hydration Process

The products of cement hydration are crucial components that contribute to the strength and durability of concrete. The primary products include:

Calcium Silicate Hydrate (C-S-H) Gel:

This gel is the primary product of cement hydration and is responsible for the binding properties of concrete. C-S-H gel fills the gaps between cement particles and aggregates, forming a dense matrix that provides strength and durability to the concrete.

Calcium Hydroxide (CH):

Another significant product, CH, also known as portlandite, forms during cement hydration. While it contributes to early strength development, its long-term contribution to concrete strength is limited compared to C-S-H gel.

Ettringite:

It is formed particularly in cement mixes containing supplementary cementitious materials like slag or fly ash. It helps in delaying the stiffening of the cement or concrete in the plastic stage.

Various Phases of the Cement Hydration Process

The hydration process occurs in different phases to attain the final strength. Here is a closer look at the phases of cement hydration:

Initial mixing reaction:

Upon adding water to cement, an immediate reaction occurs where the cement particles dissolve. Here, the dissolved particles release ions and initiate the formation of hydration products. This phase starts the chemical process for subsequent reactions to occur.

Dormancy:

Following the initial reaction, there is a period termed ‘dormancy’ where the hydration process appears to stall. Despite no visible changes, essential chemical reactions continue at a slower pace. In this phase, it might seem like no there is progress, but it is a critical stage for the development of long-term strength.

Strength acceleration:

As the hydration process gains momentum, there is a noticeable increase in strength development. Hydration products like the calcium silicate hydrate (C-S-H) gel and calcium hydroxide (CH) begin to form more extensively, enhancing the material’s strength.

Speed reduction:

Once the initial acceleration in strength development occurs, the rate of reaction gradually decreases. This reduction in speed does not imply a halt in the hydration process. It only signifies slowing down of the chemical reactions.

Steady development:

Finally, the process reaches a phase of steady and continuous development. Although the rate of reaction slows down considerably, hydration continues over an extended period. The continuation of the process contributes to the ongoing enhancement of the concrete’s properties, including its strength and durability.

Importance of Hydration of Cement

The hydration of cement holds paramount importance in the realm of construction and infrastructure for several reasons:

Strength development:

Cement hydration is the bedrock for the strength and durability of concrete. The chemical reactions that occur during hydration lead to the formation of robust compounds like calcium silicate hydrate (C-S-H) gel, enhancing the material’s strength over time.

Binding agent:

Hydration transforms loose cement particles into a solid matrix. It acts as the binding agent that holds the aggregate together to form a cohesive structure.

Durability and resistance:

Proper hydration enhances the concrete’s resistance to environmental factors like freeze-thaw cycles, chemical attacks, and abrasion. The hydrated cement paste forms a protective layer, bolstering the material’s durability against wear and tear.

Workability and construction efficiency:

Understanding hydration aids in managing the concrete’s workability and setting time, facilitating smoother construction processes. Controlling these aspects enables precise moulding, placement, and finishing of the concrete.

For more details, please visit https://www.jkcement.com/blog/basics-of-cement/what-is-cement-hydration/

What is the difference between Grade 40 and Grade 60 rebar?

Steel deformed bar grades are defined according to various international standards, the grade of a deformed bar indicates its strength and other mechanical properties. The difference between Grade 40 and Grade 60 rebar lies in their tensile strength and yield strength, which are essential factors in determining their performance and suitability for different construction applications.

What is rebar used for

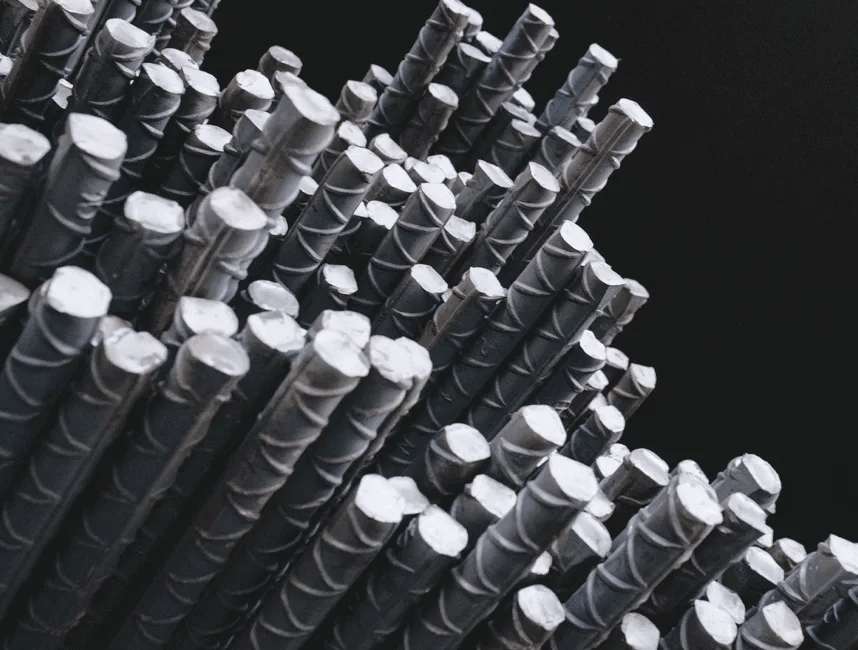
Rebar, short for reinforcing bar, is a type of steel reinforcement used in reinforced concrete and masonry structures to enhance their strength and durability. It is a fundamental component in construction, particularly in structures subjected to tensile forces, such as bending, stretching, or pulling.

Grade 40 and Grade 60 rebar are popular choices in construction for several reasons, primarily due to their strength, versatility, and suitability for various applications.

Grade 40 vs grade 60 rebar

  1. Tensile Strength:
    • Grade 40 rebar has a minimum tensile strength of 40,000 pounds per square inch (psi) or 276 megapascals (MPa).
    • Grade 60 rebar has a minimum of 60,000 pounds per square inch (psi) or 414 megapascals (MPa).
  2. Yield Strength:
    • Grade 40 rebar has a minimum yield strength of 40,000 pounds per square inch (psi) or 276 megapascals (MPa).
    • Grade 60 rebar has a minimum yield strength of 60,000 pounds per square inch (psi) or 414 megapascals (MPa).
  3. Ductility:
    • Grade 60 rebar typically exhibits slightly lower ductility compared to Grade 40 rebar due to its higher strength. However, both grades of rebar are designed to provide adequate ductility to accommodate structural loads and deformation without failure.
  4. Applications:
    • Grade 40 rebar is commonly used in light to medium-duty concrete structures where moderate strength and reinforcement are required. This includes residential buildings, sidewalks, driveways, and smaller commercial projects.
    • Grade 60 rebar is used in heavy-duty concrete structures that require higher strength and load-bearing capacity. This includes bridges, high-rise buildings, industrial facilities, and infrastructure projects where structural integrity is critical.

For more details, please visit https://mcswusa.com/grade-40-vs-grade-60-rebar/

How many square does 1 box of coil nails cover

The right planning before your roofing project can help you estimate how many roofing nails are needed for the job. Consider the foundation and framing to have an accurate weight of the nails before starting the task or hiring a professional roofing contractor.

Architectural shingles vary in roofing materials, size, and other factors such as if you’re using synthetic underlayment. Here are a few tips to know how many roofing nails per square you need.

How many coil nails per square

How to calculate roofing nails is a common question. The standard recommends using four nails per shingle on the main area of your roof and five in the first row of roofing, on average, this would be around 320 nails. If you live in high wind areas, five nails per shingle would be safest, about 480 per square.

But this can vary depending on the project, these are a few recommendations to start with:

  • Choose a nail that is the right length and size for your shingle.
  • Consider the wind conditions in your area to determine the material.
  • Estimate the weight of the roofing shingles and select your safest and most reliable nail option.
  • Become familiar with the required codes and regulations in your state.

Roofing nail materials

The material you choose depends on the roofing project you’re building. Consider these factors before selecting your roofing nails. The right kind of roofing nails can reduce labor and increase safety, durability, and reliability.

  • Galvanized steel: These are coated in zinc and resistant to rust and corrosion, a well-suited choice for asphalt shingles.
  • Stainless steel: These are even more resistant to rust and corrosion. They are the preferred option when building in areas that are more exposed to the elements.
  • Copper: Highly resistant to corrosion, they are often used for tile roofs.
  • Aluminum: Lightweight nails that don’t rust, a great choice for metal roofs.
  • Coil nails: These are used in nail guns, a time-saver for larger projects.

Benefits of Coil Nails

These types of nails are made for large projects that can benefit from a nail gun, making the job faster, easier, and more efficient.

When building any construction project, a solid foundation is very important, the roofing material, the size of roof shingles, among other factors; will determine how many roofing nails are needed and the best type for a successful installation.