Customer Support

+251-943-00-00-07

Email Us

info@Yegnatradingethiopia.com

How to Cut Plywood with a Circular Saw: A Step-by-Step Guide

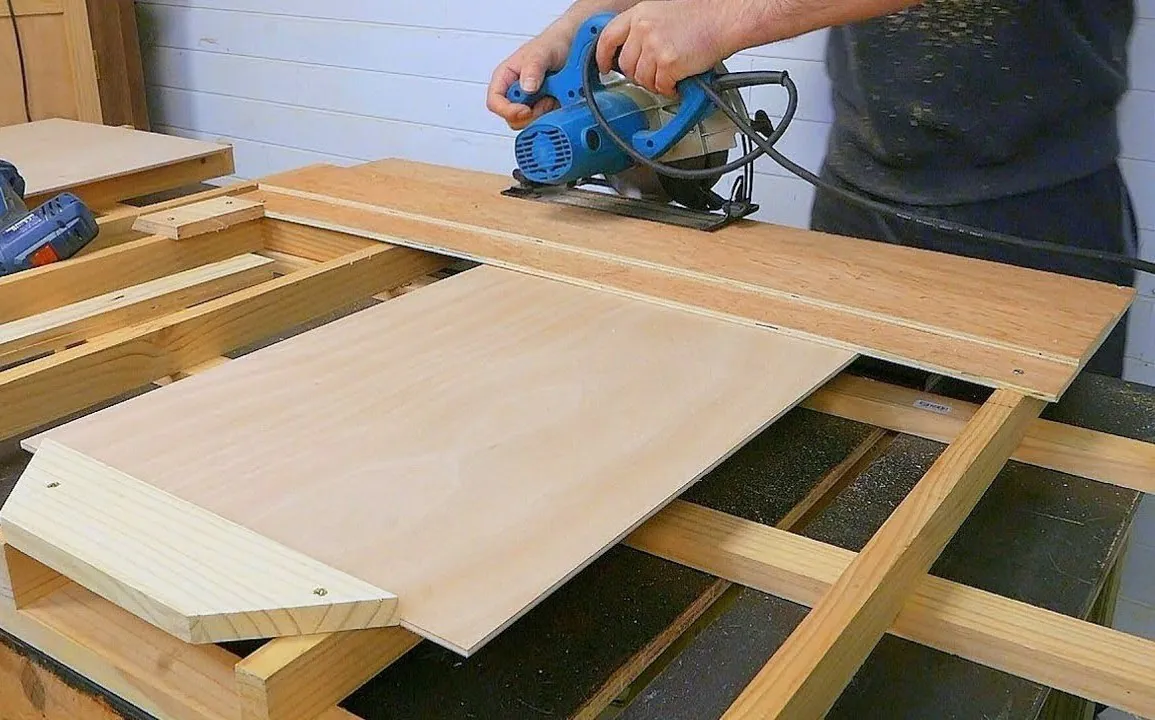
Cutting plywood with a circular saw is a crucial skill for anyone involved in woodworking, whether you are a DIY enthusiast, a professional, or just tackling a home improvement project. The circular saw is a versatile and powerful tool, but achieving clean, accurate cuts requires the right technique, proper setup, and attention to detail.

This guide will walk you through the process of cutting plywood using a circular saw, providing expert tips and troubleshooting advice along the way. Whether you’re cutting plywood for furniture, cabinets, or another project, these techniques will ensure you get the best results.

Materials and Tools Needed for Cutting Plywood with a Circular Saw

Before starting, make sure you have everything you need. Using the right tools is essential for making accurate cuts and ensuring your safety while working with a circular saw.

1. Circular Saw

A circular saw is the most commonly used tool for cutting plywood. Look for one with a fine-toothed blade that’s specifically designed for wood. For general plywood cutting, a 7-1/4-inch blade is the standard size. If you are working with thicker or tougher plywood, you may want to use a blade with more teeth or a blade designed for fine cuts.

Different saw blades work better with different types of plywood. For example:

  • Fine-toothed blades are best for softwood plywood, ensuring smooth cuts with minimal splintering.
  • Coarse-toothed blades are ideal for hardwood plywood and can help you make quicker cuts, but may leave a rougher edge.

2. Plywood

The type of plywood you choose will depend on the specifics of your project. Plywood comes in various types, such as hardwood, softwood, or MDF (Medium Density Fiberboard), and the thickness can vary from 1/8-inch to 1-inch or more. For best results, ensure that you are using a high-quality sheet of plywood to minimize the risk of splitting or warping.

3. Measuring Tape or Ruler

A measuring tape or ruler is essential to get precise measurements before cutting the plywood. A reliable measuring tape ensures that your cuts are accurate, which is key for creating components that fit together properly.

4. Pencil or Chalk

A pencil or chalk is needed to mark the cut line on your plywood. Make sure your marks are visible, but not so thick that they’ll interfere with the saw.

5. Clamps

Clamps are crucial for securing the plywood to a work surface, preventing it from shifting as you cut. A sawhorse or sturdy workbench can also provide stability.

6. Safety Gear

Safety should always be a top priority. When using a circular saw, make sure you have the following:

  • Safety goggles to protect your eyes from flying debris.
  • A dust mask to prevent inhaling fine wood particles.
  • Hearing protection to block out the loud noise of the saw.
  • Gloves to protect your hands from sharp edges and potential splinters.

7. Woodworking Square (Optional)

A woodworking square can be used to check that your cuts are square and ensure they are perfectly aligned at 90 degrees to the edge of the plywood.

Step-by-Step Guide to Cutting Plywood with a Circular Saw

Now that you have all your materials ready, let’s go through the steps for cutting plywood accurately and safely with a circular saw.

1. Prepare Your Workspace

Clear the Area

Before starting, make sure your workspace is clear of any clutter. A clean area ensures you can move freely and operate the saw safely. Additionally, ensure there is ample lighting so you can see your work clearly.

Secure the Plywood

Place the plywood on a stable surface, like a sawhorse or workbench, and secure it with clamps. If the plywood is large, make sure it is adequately supported on both sides of the cut to avoid bending, which could result in an inaccurate or dangerous cut.

Check the Blade

Before making your cut, make sure your saw blade is clean and sharp. A dull blade will make the cutting process more difficult and can cause splintering, which leads to a rough finish.

2. Measure and Mark the Cut Line

Accurate Measurement

Use a measuring tape to measure and mark the exact location of your cut. Be sure to double-check your measurements to ensure that your cuts will be the correct length. For a precise cut, use a ruler to help guide your measurement and mark the exact point on the plywood.

Mark the Cut

Once you have your measurements in place, use a pencil or chalk to mark a straight, visible cut line on the plywood. Try to keep your markings light but distinct. You’ll be following this line with your saw, so the clearer it is, the better.

Use a Square (Optional)

For perfectly straight, square cuts, particularly for crosscuts, consider using a woodworking square. This will help you check that your line is at a perfect 90-degree angle to the edge of the plywood, ensuring that your cut is accurate.

3. Set the Depth of the Cut

Adjust the Blade Depth

Set the depth of your circular saw blade to just slightly deeper than the thickness of your plywood. This ensures that the blade cuts all the way through the plywood while also minimizing splintering on the underside. Too deep of a cut can put excess strain on the saw, while too shallow of a cut may result in incomplete cuts.

4. Set the Saw’s Speed and Angle (Optional)

Choose the Right Speed

If your circular saw has variable speed settings, choose a speed that matches the thickness of the plywood. Generally, a medium to high speed works well for most plywood cuts. Thicker plywood may require a slower speed to prevent binding and ensure a clean cut.

Adjust the Angle (Optional)

If your project requires angled cuts (e.g., bevel cuts), you can adjust the saw’s base to the desired angle. Most circular saws allow angle adjustments up to 45 degrees. Be sure to lock the angle in place before starting to cut.

5. Cut the Plywood

Position the Saw

Align the saw blade with the marked cut line, ensuring that the base of the saw is flush with the plywood edge. Your saw blade should rest just slightly outside of the cut line, so you don’t cut into the marked area.

Start Cutting

Switch on the saw and let the blade reach full speed before starting the cut. Move the saw slowly and steadily along the cut line, ensuring that the base plate of the saw stays flat against the plywood surface. Allow the saw to do the work—don’t force it through the material.

Follow the Line

Keep the saw steady and follow the marked line closely. Focus on controlling the saw’s movement and guiding it along the path without pushing too hard. The smoother your movements, the cleaner the cut will be.

Minimize Splintering

To minimize splintering, always position the good side of the plywood (the side that will be visible) facing downwards. The saw will cause splintering on the underside, so positioning the better side face down ensures that the imperfections will be less noticeable.

6. Finishing the Cut

Turn Off the Saw

Once you’ve completed the cut, turn off the saw and wait for the blade to come to a complete stop before lifting it away from the plywood. This avoids unnecessary contact with the blade and ensures you don’t accidentally make another cut.

Inspect the Cut

Check the edge of the plywood to ensure it’s smooth and even. If necessary, use sandpaper or a sanding block to smooth any rough edges or splinters. This will give your project a more professional appearance.

Tips and Tricks for Better Cuts

Use Painter’s Tape

Apply painter’s tape along the cut line to reduce splintering. The tape holds the fibers together, creating a cleaner edge and preventing the plywood from chipping, especially on the top side.

Support Large Sheets

When cutting large sheets of plywood, ensure that both sides of the sheet are well supported. Use additional sawhorses or supports to prevent the material from bending or flexing during the cut, which could cause the saw to bind.

Use a Guide Rail

For long, straight cuts, consider using a guide rail or straightedge. This tool helps keep the saw aligned with the cut line and ensures you achieve a straight, professional-quality cut.

Make Multiple Passes

For thicker plywood, rather than trying to cut through the entire thickness in one go, make multiple shallow passes. This reduces strain on the saw and helps ensure a smoother cut.

Troubleshooting Common Issues

Saw Binding

If the saw binds during cutting, check if the blade is dull, the plywood isn’t properly secured, or if you are pushing the saw too fast. Reduce pressure and let the saw cut at a steady pace. Ensure the plywood is properly supported to avoid binding.

Rough Edges

If you notice rough edges, this can be caused by a dull blade or cutting too quickly. Sharpen or replace the blade, and try cutting more slowly for a cleaner finish.

Warping or Bending

To avoid the plywood from warping or bending during the cut, make sure the sheet is well supported on both sides. Use additional supports or clamps to stabilize the plywood, especially when cutting large sheets.

Alternatives to Circular Saws

While circular saws are great for cutting plywood, they aren’t the only option. If you need more precision or smoother cuts, consider using the following alternatives:

  • Jigsaw: Ideal for making curved cuts or cutting out intricate shapes.
  • Track Saw: For extremely accurate straight cuts on larger sheets of plywood, a track saw is a fantastic option. It provides precision similar to a table saw, with the portability of a circular saw.

Conclusion

Cutting plywood with a circular saw is an essential skill for anyone working on DIY or woodworking projects. By following this step-by-step guide and paying attention to the details—from setting the blade depth to ensuring proper safety precautions—you can achieve clean, accurate cuts every time.

Practice your technique, and don’t be afraid to experiment with different blade types for different plywood thicknesses. With the right approach and tools, you’ll be cutting plywood like a pro in no time!

For more details, please visit https://alvibel.pl/en/how-to-cut-plywood-with-a-circular-saw/#
OPC vs PPC Cement: Deciding the Ideal Choice for House Construction

As builders, it is important to get the best cement for construction when it comes to apartments, and to that end, OPC and PPC are two of the most common options that are available to us. Each brings its own specific set of advantages and features to the table, and thus, understanding which one would be the most suitable is crucial.

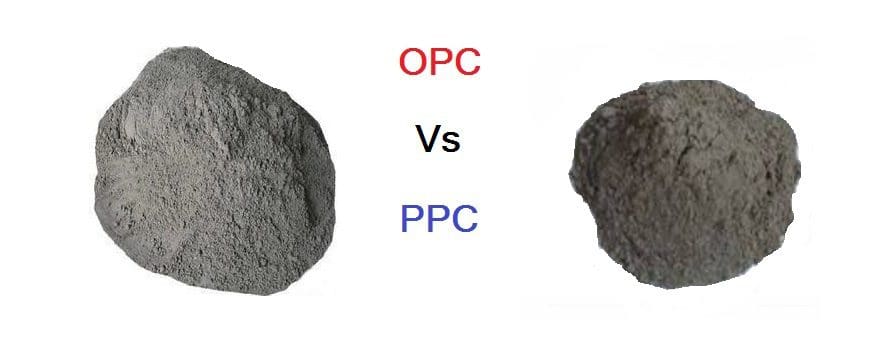
OPC, or Ordinary Portland Cement, includes ppc cement, or Portland Pozzolana Cement under its umbrella. The main difference lies in the fact that PPC includes pozzolanic materials like clay and slag, while ordinary Portland cement doesn’t feature such additives in the clinker.

In this blog, we will be taking a look at what each of them stands for, and the specific features that they bring to the table, and thus, aim to analyse opc vs ppc cement, which one’s best for house construction. So, let’s get started.

OPC Cement.

One of the most common forms of cement that’s used in construction projects in this day and age, Ordinary Portland Cement is created by crushing Portland clinkers and mixing them with gypsum and lime. In fact, lime creates 67% of the final product, making it one of the most abundant constituents of OPC cement.

Commonly, OPC is available in 3 main grades, namely OPC 33, OPC 43, and OPC 53, and each brings its own set of characteristics to the table. You would be surprised to learn that OPC derives its name from Portland stones that feature a colour that’s similar to that of cement, with the initial batches starting to enter service during the first half of the 19th century. While this type of cement has been in prominence for quite some time now, its popularity has taken a notable hit after ppc cement started to enter the market, but more on that later. Let us take a look at some of the unique features that OPC brings to the table.

  • OPC is priced a bit lower than the other forms of cement on the market, a fact that made them an easy choice for anyone who looked to complete the project on a budget.
  • OPC cement is known to have a certain degree of resistance to cracks, thereby resulting in lower maintenance bills over the years.
  • For builders looking to use cement that dries rapidly, OPC proved to be a decent option, and this is a speed that cannot be matched by ppc cement as well.

Due to the aforementioned characteristics, and aided by the fact that they are available in massive quantities, they have been commonly used to build houses, apartments, and other infra projects. With age on its side, OPC used to have a significant share of the market, but in 2023, it can safely be said that times are changing, a trend that has been initiated by ppc cement.

PPC Cement.

Developed out of OPC cement, ppc cement features a healthy addition of pozzolanic materials like slag, ash, clay, etc. With environmental compliance turning out to be a prime driver across industries, one of the most significant advantages that this type of cement brings to the table is a massively reduced amount of CO2 that’s released during the manufacturing process, along with helping in effective waste management as well.

Nowadays, there are a large number of avenues where this type of cement is commonly used, including in the construction of apartment buildings. Let us take a look at the advantages that they bring to the table in 2023.

  • Portland Pozzolana Cement helps with environment protection and the fact that it uses a lot of residual matter like slag and ash helps with effective waste management as well.
  • Since a large constituent of PPC is basically residual materials that are produced by other industrial processes, the purchase costs are noticeably lower as well.
  • PPC features a higher degree of tensile strength to the table, thereby making it suitable for use in building large apartments, bridges, dams, etc. They are highly suited for marine applications as they are resistant to sulphate attacks.
  • It is true that they settle at a pace that is slower than that of OPC cement, but the fact that they feature a smooth finish and texture helps cut down on overall construction times as well.

In this day and age, ppc cement is increasingly being used to build apartment towers and complexes, and when it comes to opc vs ppc cement, it can safely be said that ppc possesses quite several real-world advantages over opc. Thus, in most cases, ppc cement turns out to be the best cement for the construction of apartment blocks in 2023.

Final take.

When it comes to opc vs ppc cement, it is evident that Portland Pozzolana Cement does possess a significant advantage over its close peer. Yes, there are certain situations in which OPC might prove to be the better choice, but it is PPC that should be preferred by builders in most cases.

For more details, please visit https://www.mycemco.com/blog/which-best-cement-residential-apartment-construction-opc-ppc

Why Timely Rebar Delivery Is Essential for Construction Project Success

Timing is crucial in the building sector. One of the most important factors in keeping projects on schedule is timely rebar delivery. Rebar is an essential component of reinforced concrete constructions because it gives them the stability and strength they need to last. Any delay in its delivery can have a big effect on project budgets, schedules, and productivity.

The Effects of Postponed Delivery
Rebar delivery delays have the potential to raise project costs, interfere with workflows, and throw off construction schedules. Tasks like concrete pouring and structural assembly are delayed when rebar doesn’t arrive as scheduled, which results in labor inefficiencies and missed deadlines. This not only strains resources, but it also risks hurting relationships with stakeholders who expect projects to be completed on schedule.

Supporting Construction Efficiency
Rebar delivery on time is critical to the successful operation of construction projects. It enables contractors to stick to their timetables, maximize labor productivity, and eliminate unnecessary downtime. Reliable rebar suppliers recognize these problems and stress precision and punctuality in their delivery operations to meet the building industry’s stringent requirements.

Partner with a Trusted Rebar Supplier.
In a fast-paced industry where delays can have major implications, dealing with a reliable supplier is critical. Yegna Trading provides not only high-quality goods, but also the assurance of timely delivery, keeping your projects on track and within budget.

What is PPC in Cement?

Cement is an ingredient of concrete which is an essential construction material. Limestone and clay obtained from quarries are processed to form cement. Portland cement is the most widely used cement for construction. Depending on your construction needs, Portland cement can be of numerous types, out of which Portland Pozzolana Cement is used for almost all construction projects. You can find information on PPC below.

What is PPC in Cement?

The full form of PPC in cement is Portland Pozzolana Cement. PPC is a type of blended cement comprising Portland clinker, pozzolana particles and gypsum in certain specific proportions. Clinker are pebble-sized particles formed by intimately grounding limestone and clay and heating it in kilns at high temperatures. When clinker is blended with gypsum, it forms Ordinary Blended Cement (OPC), when OPC is blended with natural or artificial pozzolana particles. 

What is Pozzolana?

Pozzolana or pozzolans are particles that contain constituents which when combined with lime and water forms compounds that possess cementing properties. Pozzolana can be of the following types:

  • Natural Pozzolana:Natural pozzolana is calcined materials with pozzolanic properties. These include volcanic ash, pumicite, shales, clay, diatomaceous earth, etc. 
  • Artificial Pozzolana:Artificial pozzolanic materials include burnt clay, silica fume, fly ash produced from coal-fired power plants, blast furnace slag, etc.

Types of Portland Pozzolana Cement

Based on the type of pozzolana used, PPC can be categorised into the following:

  • Fly Ash-based PPC:In this type, artificial pozzolanic materials are blended with Portland clinker with the addition of gypsum. The fly ash-based PPC must conform to Indian Standard 3812.
  • Calcine Clay-based PPC:As the name suggests, in this type of PPC, pozzolana that is sourced naturally is blended to form PPC. 

How is PPC Made?

The following is the manufacturing process of PPC:

  1. Materials comprising lime, silica, alumina and iron oxide are intimately grounded.
  2. This mix is heated at extremely high temperatures in a kiln to form Portland clinker. 
  3. Portland clinker is further ground with fly ash or calcined clay or Portland cement is uniformly blended with the pozzolana particles. The pozzolana constituent should be in the range of 10 to 25% by mass of PPC. 
  4. Natural or chemical gypsum may be added during the grinding process.

Applications of PPC

PPC can be used in the following constructions:

  • PPC is widely used in hydraulic structures like dams that are submerged fully or partially in water to disrupt the natural flow of water.
  • PPC is also effective for marine structures like piers, wharfs, bridges, etc. erected in sea water.
  • It can be used to form pre-stressed or post-tensioned concrete members
  • You can use PPC effectively in masonry and plasterwork as well.
  • PPC offers a superior surface finish, making it ideal for decorative structures. 
  • PPC is also suitable for developing precast sewage pipes. 

Properties of Portland Pozzolana Cement2 3

Per the Bureau of Indian Standards (BIS), PPC should possess the following properties:

  • Fineness

It indicates the particle size of cement which impacts the surface area and, in turn, the heat of hydration. The surface of PPC must be at least 300m2/kg.

  • Soundness

Using the Le Chatelier method, unaerated Portland Pozzolana Cement shall not have an expansion of more than 10 mm and 0.8%, respectively. Soundness of cement is the volume change when its set and hardened. 

  • Initial Setting Time

The initial time is the time when cement turns into paste when mixed with water and begins losing its plasticity. For PPC, the initial setting time is 30 minutes (minimum).

  • Final Setting Time

The time when cement loses its plasticity completely after it has been mixed water is the final setting time. The final setting time for PPC is 600 minutes (maximum)

  • Compressive Strength 

Compressive strength refers to the capacity of concrete to withstand load without cracking or deflecting. The compressive strength of concrete at 3, 7 and 28 days should be 16MPa, 22MPa, and 33MPa, respectively.

  • Drying Shrinkage

Drying shrinkage is the contracting of hardened concrete due to the loss of capillary water. The percentage of drying shrinkage should not exceed 0.15%.

Benefits of PPC

Here are the advantages of Portland Pozzolana Cement:

  • PPC is an environment friendly cement since it uses recycle waste products (for instance, fly ash) in its production.
  • When water is added to PPC, it forms a reaction with lime and alkalies present in cement. This reaction provides strength to concrete.
  • PPC also contributes to better workability, reduces bleeding and minimises leaching of free lime.
  • PPCs have a low heat of hydration which help minise the incidence of cracks in the concrete.
  • Inexpensive constituents make PPC an economical construction material. 
  • Its resistant to sulphate attacks makes PPC an ideal construction material for hydraulic and marine structures. 
  • Portland Pozzolana Cement also prevents permeation of harmful salts and gases which facilitates corrosion-free reinforcements. 
  • The fine pozzolana materials can fill the voids caused by aggregates and subsequently minimise the shrinkage of concrete when its dry. 

For more details, please visit https://www.jkcement.com/blog/basics-of-cement/what-is-ppc-in-cement/