Customer Support

+251-943-00-00-07

Email Us

info@Yegnatradingethiopia.com

How many square does 1 box of coil nails cover

The right planning before your roofing project can help you estimate how many roofing nails are needed for the job. Consider the foundation and framing to have an accurate weight of the nails before starting the task or hiring a professional roofing contractor.

Architectural shingles vary in roofing materials, size, and other factors such as if you’re using synthetic underlayment. Here are a few tips to know how many roofing nails per square you need.

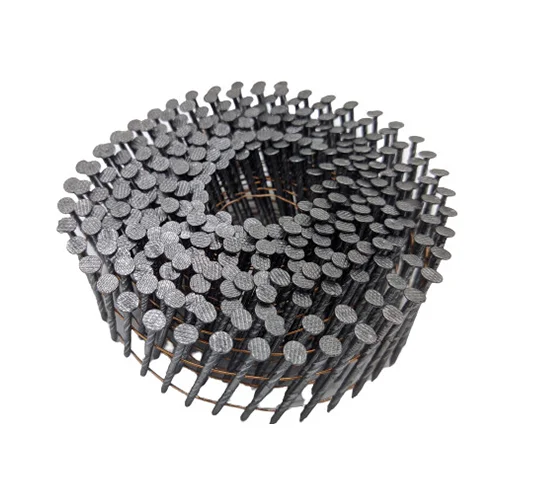
How many coil nails per square

How to calculate roofing nails is a common question. The standard recommends using four nails per shingle on the main area of your roof and five in the first row of roofing, on average, this would be around 320 nails. If you live in high wind areas, five nails per shingle would be safest, about 480 per square.

But this can vary depending on the project, these are a few recommendations to start with:

  • Choose a nail that is the right length and size for your shingle.
  • Consider the wind conditions in your area to determine the material.
  • Estimate the weight of the roofing shingles and select your safest and most reliable nail option.
  • Become familiar with the required codes and regulations in your state.

Roofing nail materials

The material you choose depends on the roofing project you’re building. Consider these factors before selecting your roofing nails. The right kind of roofing nails can reduce labor and increase safety, durability, and reliability.

  • Galvanized steel: These are coated in zinc and resistant to rust and corrosion, a well-suited choice for asphalt shingles.
  • Stainless steel: These are even more resistant to rust and corrosion. They are the preferred option when building in areas that are more exposed to the elements.
  • Copper: Highly resistant to corrosion, they are often used for tile roofs.
  • Aluminum: Lightweight nails that don’t rust, a great choice for metal roofs.
  • Coil nails: These are used in nail guns, a time-saver for larger projects.

Benefits of Coil Nails

These types of nails are made for large projects that can benefit from a nail gun, making the job faster, easier, and more efficient.

When building any construction project, a solid foundation is very important, the roofing material, the size of roof shingles, among other factors; will determine how many roofing nails are needed and the best type for a successful installation.

Blog About Plywood
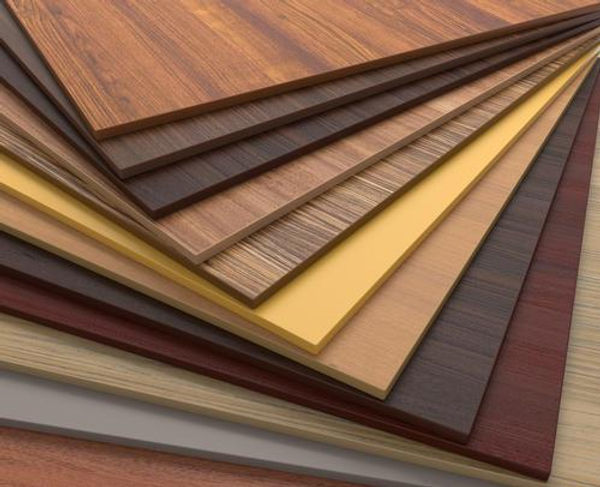
How To Select Good Quality Plywood

If you’re planning on creating furniture or want to revamp your home or office environment, you will want the finest plywood available. Finding the right plywood that meets your desired requirements is central to any construction or woodworking project. This is because bad quality plywood can significantly impact the durability as well as the appearance of the finished product. 

Several types of plywood are available, and each differs in durability, aesthetic, and grade. This makes selecting good quality plywood tedious and time-consuming. Let’s discover the most important factors you need to consider when selecting good-quality plywood to help you make a smart decision.

Here’s a comprehensive guide to selecting the best quality plywood in India for your unique requirements. 

Five Factors to Consider When Choosing the Best Quality Plywood 

Here are five factors that you should consider to ensure you buy good quality plywood.  

1. Plywood Grade (H3)

There are several different grades of plywood available in the market. Each grade is engineered for specific purposes and applications. For example, exterior-grade plywood is better suited for outdoor furniture where weather fluctuations, moisture, and other wear-and-tear elements are prevalent. Similarly, interior-grade plywood is, as the name suggests, intended for indoor use. This type of quality plywood focuses more on the aesthetics side of things and presents a smooth and elegant finish.  

Furthermore, when it pertains to these wood products, the most common grading systems to watch out for are the Engineered Wood Association and European Grading Standards. These grading systems can be used to get more specific details about the quality and suitability of the plywood you are purchasing. The higher the grade, the better quality plywood you get.  

2. Thickness of the Plywood 

The thickness of the plywood is essential for projects where structural integrity and durability matter. Good quality plywood usually tends to be thicker than most other kinds, making it more robust and durable in the long run. Thicker plywood is used for more heavy-duty applications, while lighter plywood is sufficient for things like shelving. You can select the appropriate plywood thickness depending on your unique requirements.

3. Different Types of Plywood Core 

Another important factor to consider when selecting good-quality plywood is the type of core. Plywood comes in three primary core types: particle board, veneer, and MDF. MDF is made from a fibreboard centre with veneer layers on the top, while particle board plywood is constructed from wood particles and sawdust glued together. While not as sturdy as veneer plywood, it presents as a more economical alternative nonetheless. 

However, the most common type of plywood is the veneer core plywood. This is because it is engineered by bonding multiple layers of wood veneers together using an adhesive agent. This ensures that it is strong and highly reliable, making it ideal for a variety of applications and uses. 

4. Wood Species Used for the Plywood 

It is important to factor in the species of wood utilized for the veneer layers when choosing the best quality plywood for your requirements. The wood species can have a distinct influence on the overall appearance and strength of the plywood you are purchasing. The most prevalent types of wood species used in making good quality plywood include oak, pine, birch and fir. 

5. Plywood Pricing and Your Budget 

Lastly, it is essential to adhere to your predetermined budget when buying quality plywood. This is because prices can vary significantly when it comes to plywood and other wood products. 

The pricing of plywood is based on numerous factors such as its durability, lifespan, waterproofing capabilities, grade rating, the type of core, wood species and even the company brand. It is thus important to strike a delicate balance between functionality and quality to select the best quality plywood that works for you.

For more details, please visit https://appleplywoods.com/plywood-buying-guide-how-to-select-good-quality-plywood/

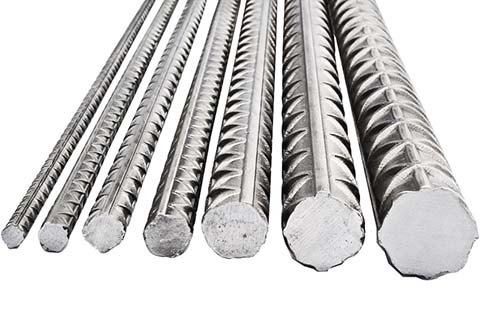
How to calculate rebar weight?

The procedure to use this calculator to calculate the weight of rebar is very simple. The steps to do so are as follows:

  • There is no need to measure rebar dimensions because standard sizes of rebar are available in the market.
  • Simply enter the diameter and length of the rebar as instructed by the structural engineer. Be sure to enter the diameter of the bar in millimeters.
  • Omit the quantity field if you only want to calculate the weight of a single rebar.
  • Enter the number of bars in the quantity field if you want to estimate the weight of the rebar in combos.
  • The results will be displayed in kg and kg/m.

Standard Sizes & Weight of Rebar (Reinforcing Bars)

The standard sizes of reinforcing bars which are available in the market are as follows:

Size of Bar (dia)Weigth/Mass Per Meter (kg/m)c/s Area (sq.mm)
6 mm0.22228.3
8 mm0.39550.3
10 mm0.61778.6
12 mm0.888113.1
16 mm1.58201.2
18 mm2254.6
20 mm2.47314.3
22 mm2.98380.3
25 mm3.85491.1
28 mm4.83616
32 mm6.31804.6
36 mm7.991018.3
40 mm9.861257.2
45 mm12.501591.1
50 mm15.421964.3

Rebar Weight Chart

Rebar Weight Calculation Formula

The weight of rebar can be easily calculated using this standard formula mentioned below:

W= (D2/162.28)* L 

Where ‘D’ and ‘L’ are the diameter and length of the reinforcing bar, respectively. Take the value of the diameter in terms of millimeters and the length in terms of meters. You will get the results in kilograms (Kg). After dividing the results with the actual length of the rebar, you can get the weight per running meter.

Let us understand this formula with a simple example.

Ex: Calculate the weight of the TMT bar that has a diameter of 8 mm and a length of 12 meters.

Solution: Using the rebar weight calculation formula, you can find the mass of TMT rebar by putting the mentioned values into the given formula.

W= (D2/162.28)*L
W= ( 82/162.28)*12 = 4.732 Kg

Now calculate the weight per meter,

width = 4,732/ length
W = 4.732/ 12 = 0.395 Kg/m

We hope that this example has helped you understand better and cleared all your doubts.

For more, please visit https://us-rebarestimate.com/how-to-calculate-rebar-weight/

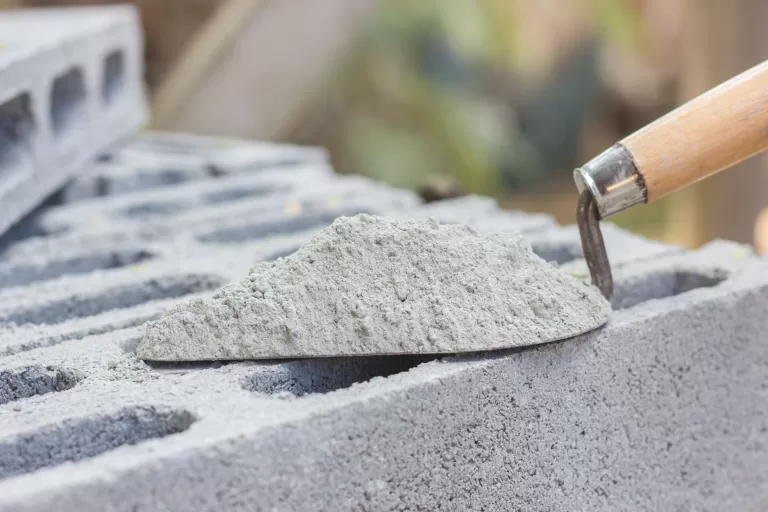
How Much Cement is Required For a 1000 Sq Ft House?

Building a house comes with its share of questions and considerations. One of them is understanding the amount of cement needed for the construction process. Cement serves as the foundation of structural integrity. It is a binding agent that holds a structure together. So, here is a guide to help you determine how much cement is required for a 1000 sq ft house.

Understanding Area Measurement

Area measurement refers to the quantification of the surface covered by a two-dimensional shape or space. It is usually measured in square units such as square feet, square meters, square inches, etc.

It is essential to measure it accurately, as it ensures precise dimensions. It helps you understand exactly how much cement is required for a 1000 sq ft house, among other important construction materials.

Here are some factors that influence area measurements for a 1000 sq ft house:

Layout & Design:

The layout and design of the house significantly impact its area measurement. Different architectural styles and floor plans can result in variations in the distribution of space within the 1000-square-foot area.

Room Configuration:

The number and size of rooms within the house can affect its area measurement. For example, a house with larger rooms will have a different area distribution compared to one with several smaller rooms.

Interior Features:

Features like closets, hallways, staircases and built-in furniture can reduce the available floor space within the house. This can affect the overall area measurement.

Wall Thickness:

The thickness of interior and exterior walls can affect the usable floor area. Thicker walls tend to reduce the interior space available for rooms and other living areas.

Building Codes and Regulations:

Local building codes and regulations may influence specific requirements for minimum room sizes, ceiling heights and other factors.

Structural Elements:

Structural elements like beams, columns, and load-bearing walls also occupy space within the house, contributing to the total area measurement.

Exterior Features:

Exterior features such as porches, decks, balconies and garages may or may not be included in the 1000-square-foot measurement. Typically, this may depend on whether they are enclosed or open-air spaces.

How Much Cement Do You Need for a 1000 Sq. Ft House?

Determining the amount of cement required for a 1000-square-foot house entails a systematic calculation process. Here’s an overview:

Calculation Method

To calculate the cement requirement for a 1000 square feet house, you need to consider the following steps:

  • Start by estimating the volume of concrete needed for the construction. Concrete usually comprises cement, sand and aggregates (like gravel or crushed stone). Determine the volume required based on the structural design and specifications.
  • Calculate the proportion of cement to sand to aggregates in the concrete mix. The mix ratio will depend on the type of concrete grade required, whether M25, M30, M45, etc.
  • Once the cement-sand ratio is established, calculate the quantity of cement needed. This is done by dividing the total volume of concrete by the sum of the ratios (cement + sand).
  • Account for wastage during handling and mixing, usually around 5-10% of the calculated quantity. Doing so will ensure you have enough material on-site.

Illustration:

Let’s assume that you need to measure the cement required for a 1000 sq. ft slab for the ground flooring. The concrete grade required is M25, where typically, the mix ratio is 1:1:2, i.e., 1 part cement, 1 part sand and 2 parts coarse aggregates. However, in order to calculate the cement aspect of the concrete, you first need to determine how much concrete is needed.

Step 1: Determine the volume of concrete needed

For a 1000 sq. ft area, let’s consider the thickness of the slab to be 6 inches or 0.5 ft.

Volume of Concrete = Total Area X Thickness = 1000 x 0.5 = 500 cubic ft.

Note that this is the volume of the final concrete mixture which is wet since concrete is a mixture of water, cement, sand and aggregates. The dry volume of concrete is 52% more than its wet volume. This is because the volume of dry concrete will decrease after you add water to it.

Dry Volume of Concrete = Wet Volume of Concrete + 52% of Wet Volume of Concrete

= 500 +  [(52/100) X 375]

= 695 cubic ft

Therefore, the wet volume of concrete here is 695 cubic feet.

Step 2: Calculate the volume of cement in the concrete

Now, the total volume of concrete needed is 695 cubic feet. The specified ratio is 1:1:2, indicating one part cement, one part sand and two parts coarse aggregates.

The total part = 1 + 1 + 2 = 4

Cement Quantity = (Cement Part / Total Part) X Dry Volume of Concrete

= (1 / 4 ) X 695 = 173.75 cubic ft

Therefore, the volume of cement will be 173.75 cubic feet.

Step 3: Determine the number of cement bags required

Now, 1 bag of cement is 50 kg and it equals 1.23 cubic ft.

To calculate how many bags we need here, we simply divide the volume of cement by 1.23 cubic feet.

Number of Cement Bags Required = 173.75 / 1.23 = 141.26 ≅ 142 bags.

Hence, for a 1000 sq. ft concrete slab with M25 grade concrete, you would require approximately 142 bags of cement.

Note: While the provided calculation offers an estimate, determining the precise number of cement bags for your house requires consultation with a civil engineer or a local constructor.

For more details, please visit https://www.jkcement.com/blog/construction-planning/how-much-cement-required-for-1000-sq-ft-house/

Everything You Need to Know About Storing Cement at Construction Sites

Effectively storing cement at construction sites is important for maintaining its quality. It also helps you ensure optimal performance in concrete construction. Improper storage, on the other hand, can lead to several issues that can compromise the overall strength of the final structure. To dodge such issues, let us dive into the guidelines and best practices on how to store cement on-site. Keep reading to learn more.

Why is it Important to Store Cement Properly?

Proper storage of cement is paramount in construction projects due to several critical reasons. These include:

Moisture Prevention:

Cement is highly susceptible to moisture absorption and this can lead to clumping. This can compromise its effectiveness in concrete mixing.

Maintaining Quality:

Incorrect storage conditions can diminish the cement’s quality and performance.

Preventing Lumps:

Proper storage of cement prevents the formation of lumps in the cement, ensuring a smooth and consistent mix during the concrete preparation process.

Better Strength:

By safeguarding cement from environmental factors, its inherent strength and binding properties remain intact. This contributes to the overall durability and longevity of the constructed infrastructure.

Less Wastage:

Proper storage practices minimise wastage by preserving the usability of the entire cement quantity. This prevents the need for replacement due to compromised quality.

Precautions for Proper Cement Storage

To know how to store cement bags properly, adhere to these key precautions:

Dry Storage

Cement should be stored in a dry environment, as exposure to moisture can lead to clumping and compromise its chemical composition.

Elevated Platform

Store cement on an elevated platform, at least 150 mm above the ground, to prevent direct contact with soil and minimise the risk of moisture absorption.

Covered Storage

Be it cement for house construction or any other project, use a covered storage area to shield it from rain and direct sunlight. Precipitation can accelerate the deterioration of cement quality.

Ventilation

Ensure proper ventilation in the storage area to prevent condensation as it can contribute to the formation of lumps in the cement.

Proper stacking

You may stack cement bags on top of each other, however, the height of the stack should not be more than 10 bags. This prevents the potential lumping of the cement under pressure. Also, the width of the stack should not be more than 3 metres or the length of four cement bags. If a stack comprises more than 8 bags, arrange the bags alternatively lengthwise and crosswise. This way, you can reduce the possibility of the bags toppling.

First-In-First-Out (FIFO)

Follow the FIFO principle wherein you use older batches of cement before the newer ones. This will help you prevent prolonged storage and potential quality degradation.

Seal Bags

Seal opened cement bags tightly to minimise exposure to air and moisture. Use the entire contents of the bag once opened to maintain freshness.

Regular Inspection

Conduct routine inspections to identify any signs of moisture, lump formation, or other issues. Promptly address any concerns to prevent further deterioration.

Use Pallets

Placing cement bags directly on the ground exposes them to the risk of moisture absorption, especially in humid or damp conditions. Pallets act as a protective barrier, lifting the bags above the ground surface. They prevent direct contact with soil moisture. This helps you maintain the dryness of the cement and preserve its quality.

Do not use a hook to lift the cement bags

Hooks can puncture or tear the bags. This can allow dust and moisture to affect the quality of the cement. To ensure the preservation of the cement and the integrity of the materials, use specialised cement handling tools such as forklifts, pallet jacks, or lifting straps. Such tools facilitate secure and damage-free handling, guaranteeing that your cement retains its optimal condition.

Use Polythene Covers

Many construction sites use polythene covers to wrap and seal cement bags. This offers an additional layer of protection against moisture and external contaminants.

FAQs

What problems can arise from improper storage of cement?

Improper storage of cement can lead to issues such as moisture absorption, clumping, and a decrease in quality. These problems may compromise the effectiveness of the cement in construction projects, affecting the overall integrity of structures.

How often should stored cement be inspected?

Stored cement should be inspected regularly for signs of moisture, lump formation, or any issues that may compromise its quality. Regular inspections help ensure optimal conditions for construction use.

How can air circulation be facilitated during storage?

Placing cement bags on pallets elevates them, allowing air to circulate underneath and around each bag. This facilitates proper air circulation and prevents condensation. It ensures the cement remains dry and in good condition.

How do temperature and humidity affect cement quality?

Extreme temperatures and high humidity can adversely affect cement quality. Temperature variations may impact the hydration process, while humidity can lead to moisture absorption, consequently compromising the concrete’s structural integrity.

Can cement be stored for an extended period?

Extended storage of cement is not recommended; it’s best to use cement within a reasonable timeframe to maintain optimal quality.

For more, please visit https://www.jkcement.com/blog/construction-planning/how-to-store-cement-on-site/

Galvanized steel rust resistance: understanding its longevity and durability

Does galvanized steel rust? Galvanized steel is steel that has been coated with a protective coating or layer of zinc metal to protect it from corrosion. This process, known as galvanization, enhances the steel’ durability. Let’s expand on how galvanization works and its effectiveness in preventing rust. 

How galvanization works

Corrosion resistance can be prevented with a galvanized finish. This thin layer of protective zinc coating goes through different processes for corrosion protection.

  1. Coating process:
    • Hot-dip galvanizing: The steel is dipped into a molten zinc bath. This method produces a thick and durable zinc coating that adheres well to the steel.
    • Electro-galvanizing: The steel is coated with zinc using an electrochemical process. This results in a thinner, more uniform coating compared to hot-dip galvanizing.
  2. Zinc protection:
    • Barrier protection: The zinc coating acts as a physical barrier between the steel and environmental elements like moisture and oxygen, which are necessary for rust formation.
    • Sacrificial protection: Zinc is more reactive than steel and corrodes preferentially. When exposed to moisture, the zinc corrodes before the underlying steel, thereby protecting it.

Effectiveness and Longevity

  1. Rust resistance:
    • Durability: The zinc coating provides excellent protection against rust and corrosion. It’s particularly effective in environments with moderate exposure to moisture.
    • Longevity: The lifespan of galvanized steel depends on factors such as the thickness of the zinc coating, the environment, and the level of exposure to corrosive elements. For example, hot-dip galvanizing provides a more robust coating and longer-lasting protection compared to electro-galvanizing.
  2. Environmental factors:
    • Atmospheric conditions: In environments with high humidity, industrial pollutants, or salt (such as coastal areas), galvanized steel may experience faster wear. However, it still outperforms untreated steel in these conditions.
    • Exposure to chemicals: Galvanized steel can be affected by certain chemicals and acids. For aggressive environments, additional protective coatings might be needed.
  3. Maintenance:
    • Low maintenance: Galvanized steel generally requires minimal maintenance. Regular cleaning can help remove debris and reduce the risk of localized corrosion.
    • Inspection: Periodic inspections can ensure the integrity of the coating and address any issues before they lead to significant damage.

For more, please visit https://mcswusa.com/does-galvanized-steel-rust/

Rebar Diameter Blog
Rebar Diameter: The Big Difference in Construction

When it comes to construction, every detail matters. One of the most critical aspects that can significantly impact the strength and stability of a structure is the rebar diameter. The choice between different rebar diameters can make a world of difference in the final outcome of a construction project. Let’s dive into the world of rebar and explore the big difference it makes in construction.

The Role of Rebar in Construction
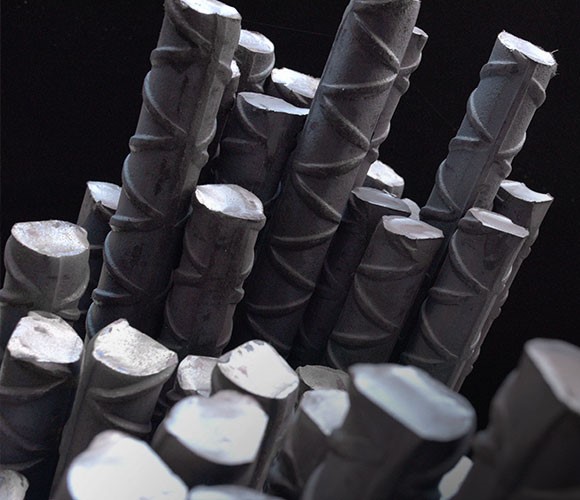
Rebar, short for reinforcing bar, is a critical component in reinforced concrete. It’s made from steel and is used to strengthen concrete structures by providing tensile strength that concrete lacks. Imagine rebar as the backbone of a concrete structure, giving it the strength and support it needs to withstand the test of time.

Why Rebar Diameter Matters
The diameter of rebar is not just a number; it’s a determinant of the strength and capacity of a structure. Larger diameter rebar can carry more load and provide greater resistance to bending and breaking. On the other hand, smaller diameter rebar is more flexible and easier to work with but may not offer the same level of strength.

The 6mm Rebar: A Game Changer?
So, what’s the big deal about 6mm rebar diameter? It might not seem like a lot, but in the world of construction, every millimeter counts. A 6mm rebar is a popular choice for many reasons. It offers a good balance between strength and workability. It’s strong enough to support most residential and commercial structures, yet it’s not so large that it becomes difficult to handle or place in the concrete.

Comparing Rebar Diameters
When comparing different rebar diameters, it’s essential to consider the specific requirements of the project. A 6mm rebar might be perfect for one project, while a 12mm or 16mm rebar might be necessary for another. The choice depends on factors such as the load-bearing capacity needed, the size of the structure, and the design specifications.

The Impact on Construction Costs
The rebar diameter can also have a significant impact on construction costs. Larger diameter rebar is generally more expensive, which can increase the overall cost of a project. However, it’s essential to weigh the cost against the benefits of using a stronger, more durable material that can withstand the rigors of time and weather.

The Human Element: Working with Rebar
Working with rebar is not just about the physical strength of the material; it’s also about the skill and experience of the workers. A 6mm rebar might be easier for workers to handle and bend into place, which can save time and reduce the risk of injury. This is especially important in large construction projects where efficiency and safety are paramount.

The Environmental Considerations
In today’s world, where sustainability and environmental impact are becoming increasingly important, the choice of rebar diameter can also play a role. Using the appropriate diameter for a project can help minimize waste and reduce the overall environmental footprint of the construction process.

The Future of Rebar in Construction
As construction techniques and materials continue to evolve, so too will the role of rebar in the industry. We can expect to see new innovations in rebar technology that will further enhance the strength and durability of concrete structures. The 6mm rebar may just be the beginning of a new era in construction.

Wrapping Up
In conclusion, the choice of rebar diameter is a critical decision in any construction project. It’s not just about the size; it’s about finding the right balance between strength, cost, workability, and environmental impact. The 6mm rebar offers a versatile solution that can meet the needs of many projects, but it’s essential to consider the specific requirements of each job to make the best choice. Whether you’re a contractor, an architect, or a homeowner, understanding the big difference that rebar diameter makes is crucial to ensuring the success and longevity of your construction project.

For more details, please visit https://blog.okorder.com/6-rebar-diameter-the-big-difference-in-construction/

Uses of cement

At present, the cement is widely used across the world in the construction of various engineering structures. It has proved to be one of the leading engineering material of modern times and has no rivals in production and applications. Cements may be used alone (i.e., “neat,” as grouting materials), but the normal use is in mortar and concrete in which the cement is mixed with inert material known as aggregate to form a strong binding material. Following are various possible applications or uses of cement:

  1. The most significant use of cement is production of concrete and mortar.
  2. Cement mortar can be used for masonry work, plaster, pointing, etc.
  3. Cement concrete can be used for laying floors, roofs, constructing lintels, beams, weather sheds, stairs, pillars, etc.
  4. It can be used for construction of important engineering structures such as bridges, culvert, dams, tunnels, storage reservoirs, light houses, docks, etc.
  5. It can also be used for construction of water tanks, tennis courts, septic tanks, lamp posts, roads, telephone cabins, etc.
  6. It can be used for making joints for drains, pipes, etc.
  7. It can be used for manufacturing precast pipes, garden seats, artistically designed urns, flower pots, dust bins, fencing posts, etc.
  8. It can be used for preparation of foundations, watertight floors, footpaths, etc.
  9. It can be used for creating fire-proof structures in the form of concrete. Also, it can be used for making acid-resistance and waterproof structures.
  10. Colored cement can be used for decorating or coloring the structures.
  11. It can be used for shotcreting the tunnel or geological walls to strength the structure.

Despite so many uses of cements, it has few demerits. However, its usability far overcomes its demerits. Some of the negatives of cement are as follows:

  1. Structure once build out of cement are difficult to be displaced or reused. They can’t be easily recycled like plastics or steels.
  2. Cement structure are very heavy. So, while building skyscrapers, it can’t be totally build on cement. Instead steel structures are placed.

For more details, please visit https://shorturl.at/vrGCQ

Rebar Size
How to read a rebar size chart?

Looking at a rebar size chart provides information about the dimensions and specifications of reinforcing bars used in construction. Traditional steel rebar sizes are standardized based on their nominal diameter, which is typically expressed in eighths of an inch. However, there are many other factors to take into consideration before starting your project. Keep reading for a general overview of what you might find on a size chart and how to choose the most suitable rebar.

What can you find on a rebar size chart?

  1. Rebar designation: Rebar is assigned a number that corresponds to their diameter. For example, #3 rebar has a diameter of 3/8 inch, #4 rebar has a diameter of 1/2 inch, and so on.
  2. Diameter: The diameter of the rebar is one of the key dimensions provided in the chart. It’s usually specified in both inches and millimeters. Common diameters include 3/8 inch, 1/2 inch, 5/8 inch, 3/4 inch, and 1 inch, among others.
  3. Weight per unit length: The weight of rebar is used for estimating purposes. The weight per foot or per meter of each rebar size is typically listed in pounds (lbs) or kilograms (kg).
  4. Area: The cross-sectional area of the rebar, often expressed in square inches or square millimeters, calculates the amount of reinforcement provided in a concrete structure.
  5. Typical applications: Some charts may also include information about the typical applications or uses for each rebar size. This can help in selecting the appropriate rebar for different construction projects.
  6. Standards and grades: Rebars are manufactured according to various standards and grades, such as ASTM. The chart may specify the applicable standards and grades for each rebar size.
  7. Tensile strength: In some cases, the tensile strength of the rebar (measured in pounds per square inch, or psi) may be included, particularly in technical specifications.

Why do you need a rebar size chart?

Checking out a rebar size chart can help you select the best products for your project. These are some of the benefits:

  • Selection of appropriate sizes: Rebar size charts help in selecting the appropriate diameter and weight of rebar needed for a specific construction project. Different projects may require different sizes of rebar depending on structural requirements, load-bearing capacities, and specifications.
  • Estimation and planning: Engineers and contractors use these size charts to estimate the quantity of rebar required for a project. By knowing the dimensions and weight per unit length of each rebar size, they calculate the amount of reinforcement needed for concrete structures such as foundations, slabs, columns, and beams.
  • Standards: These charts provide information about the standards and specifications of each size. This makes sure the rebar meets the strength, durability, and quality standards required by building codes and regulations.
  • Structural integrity: Using the correct size and spacing of rebar is crucial for ensuring the structural integrity and safety of concrete structures. The charts help engineers and architects make informed decisions to prevent issues such as cracking, structural failure, or inadequate reinforcement.
  • Efficiency in construction: Having access to accurate information facilitates efficient construction planning and execution. It helps streamline the procurement process, minimize material waste, and optimize labor resources on-site.
  • Cost-effectiveness: By knowing the rebar grade and weights of different rebar sizes, construction professionals can make cost-effective decisions regarding material procurement and usage. This helps in controlling project costs while maintaining quality and safety standards.

For more details, Please visit https://mcswusa.com/how-to-read-rebar-size-chart/.

Tie Beam Construction

Tie Beams is a type of beam used in construction to tie the footing and avoid the slender column effect in the structure. We provide this type of beam when the two footings are in the same line. It connects two or more than two columns and makes a structure as a frame. It is used in the construction of buildings to avoid the settlement of columns or foundation. It helps to carry the horizontal load of the column. We should provide tie beams in buildings if the height of the column is greater than 4-5m. There is no need to provide tie beams if the height of column is less than 4m.

We can use tie beams in buildings when the height of the roof is higher than the normal height of the structure. Tie beams behave as a length breaker in the column. By joining two or more columns, these beams help to reduce their effective length and slenderness ratio. Most of the time, this type of beam is constructed above the plinth level and in roof trusses.

It increase the stiffness of structure as it ties two columns for two movements i.e. vertically and horizontally. Let us consider two columns, column A and column B which are tied together. The tie beam provides resistance to its settlement by shifting force to column A, when column B settles. When column B is moved horizontally then, column B and column A are tied with a tie beam to provide a frame action which helps to reduce horizontal deflection. Tie beams can be constructed at any level.

It is applied in the construction to carry the axial compression. It also reduces the effective length of the column and prevents the column from buckling.

The reinforcement (steel) is required for construction of these type of beams. We can estimate the quantity of reinforcement that is needed for tie beam construction. Main bars (Top bar, Bottom bar and Side bar) are the horizontal bars that ties one footing to the other footing and stirrups are the vertical bars that frames the main bars in the correct position.

Main Bars for Tie Beams

We should calculate the length, number, diameter, total length and total weight of main bars in top, bottom and side bars.

Stirrups for Tie Beams

We should calculate the length of stirrup by removing the concrete cover from all sides. We should calculate the length of stirrup containing hook. The total number and length of stirrups is calculated. The total weight of stirrups is calculated.

Structural engineer design and adopt the length, diameter and number of bars by implementing the load analysis.

For more details, please visit https://rebarpeople.com/tie-beam-construction/.